
You’ll get lasting value from budget DIY garden landscaping by improving bed shapes, adding stable paths, planting locally suited perennials, and creating a usable seating area. Keep your first projects small enough to finish properly, with money reserved for the groundwork that supports everything above it.
Exploring practical DIY landscaping ideas helps you prioritize high-impact upgrades without overspending. For these 30 DIY garden landscaping ideas, stretch your budget with divided plants, reclaimed materials in sound condition, and bulk mulch where delivery makes sense.
Approaching your yard through phased DIY landscaping keeps costs under control while delivering noticeable results. Measure before gathering supplies, check your hardiness zone, and watch how sunlight and water move through your yard.
1) Create a Curved Flower Bed With Mulch
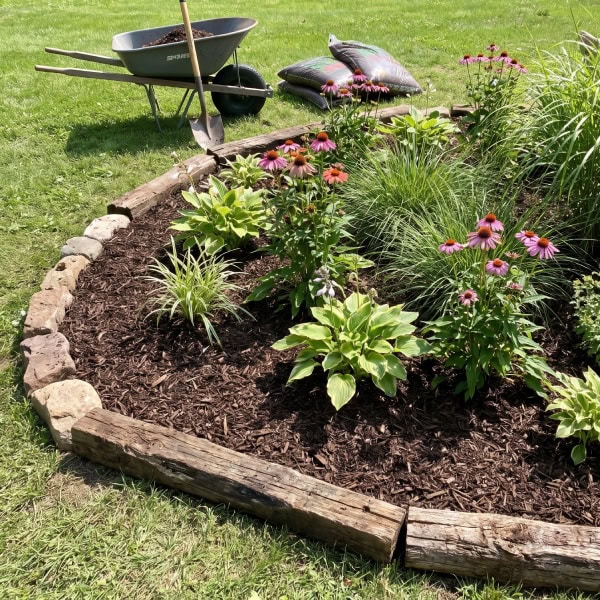
Give your lawn a more deliberate shape by outlining a flower bed with broad, gentle curves. Use a garden hose to test the outline, including whether your mower will follow it comfortably.
Remove the turf and persistent weeds before planting. Loosen compacted soil where appropriate, then arrange plants according to their mature widths so you avoid an overcrowded border.
Finish with about 2–3 inches of shredded wood mulch, keeping it clear of plant crowns and tree trunks. Ask your municipality about clean wood chips, and inspect any free material for trash before spreading it.
2) Lay a Stepping-Stone Garden Path
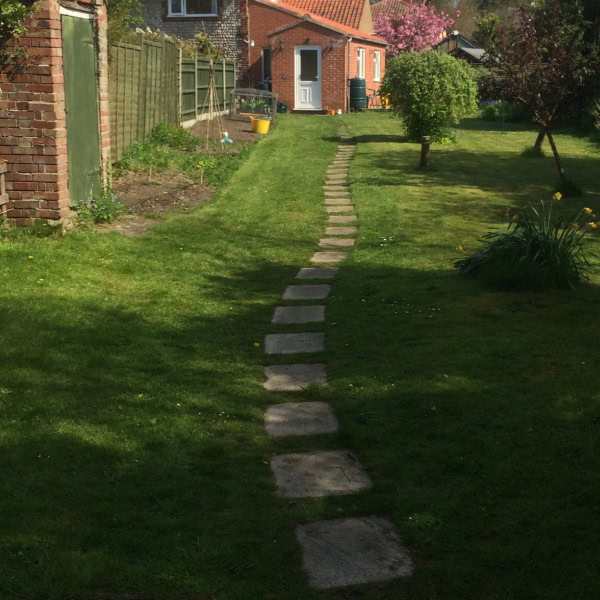
Connect your patio, shed, or raised garden beds with stepping stones placed at your natural walking stride. Lay out the entire route aboveground first and walk it several times before excavating.
For stable garden paths with pavers, remove soft organic material beneath each stone and prepare a compacted aggregate base suited to your soil. Use a thin leveling layer and seat each stone firmly so it stays steady underfoot.
Keep the tops flush with adjacent lawn where you mow. For wheelchair access or frequent wheelbarrow trips, choose a continuous, firm path with tight joints.
3) Plant a Low-Maintenance Native Perennial Border
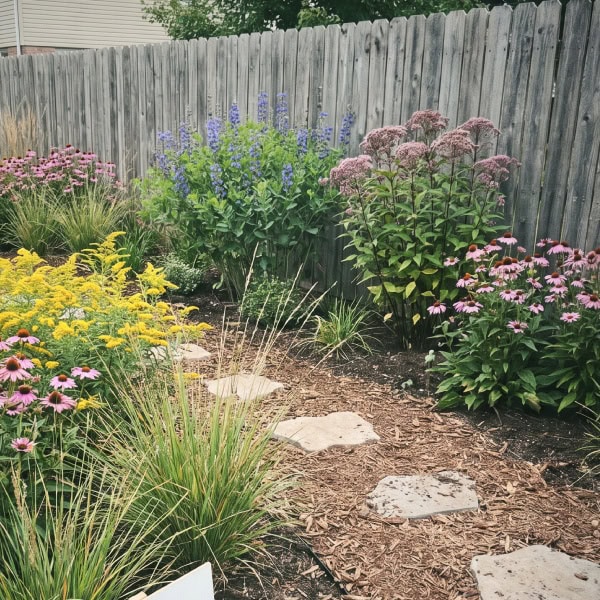
Build your border around native perennials matched to your region’s rainfall, soil, and available sunlight. Check local extension recommendations before choosing plants because a species native elsewhere in the United States might be poorly suited to your yard.
Keep your perennial planting design cohesive by repeating a few species in generous groups. Position taller plants toward the back and leave the recommended mature spacing between crowns.
Save money with small plugs or healthy divisions from local gardeners. Water through establishment, and leave selected seed heads standing where they provide winter structure and food for birds.
4) Build a Pea Gravel Seating Patio
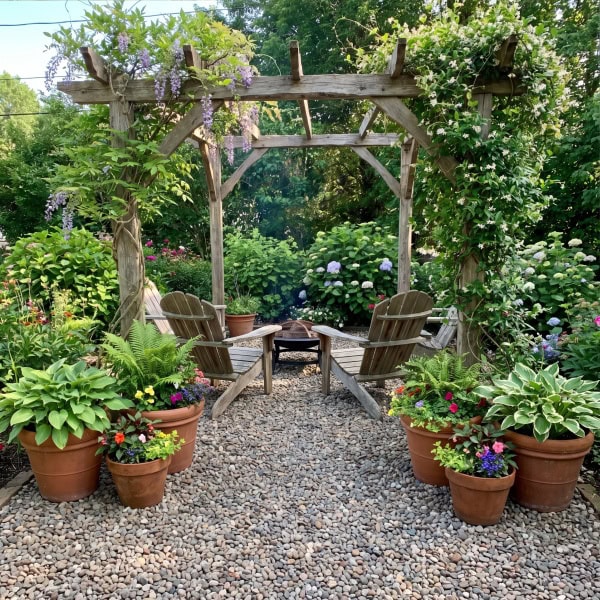
Create an affordable seating area with a contained pea gravel surface over a properly prepared base. Mark out enough room for your furniture plus space to pull chairs back comfortably.
Remove turf and organic soil, then install a compacted crushed-stone base appropriate for your site. Grade the surface away from your house and secure sturdy edging before adding a shallow layer of pea gravel.
Test your furniture on gravel before committing to the material. Narrow chair legs sink into loose stones, so use broad-footed seating or incorporate level paver pads beneath the furniture.
If you want overhead shade and architectural height, frame the seating zone with an open wooden pergola.
A freestanding pergola also creates a natural framework for climbing vines and defining your outdoor living area.
You can also position potted plants around the border to soften transitions between gravel and garden beds.
5) Edge Garden Beds With Reclaimed Bricks
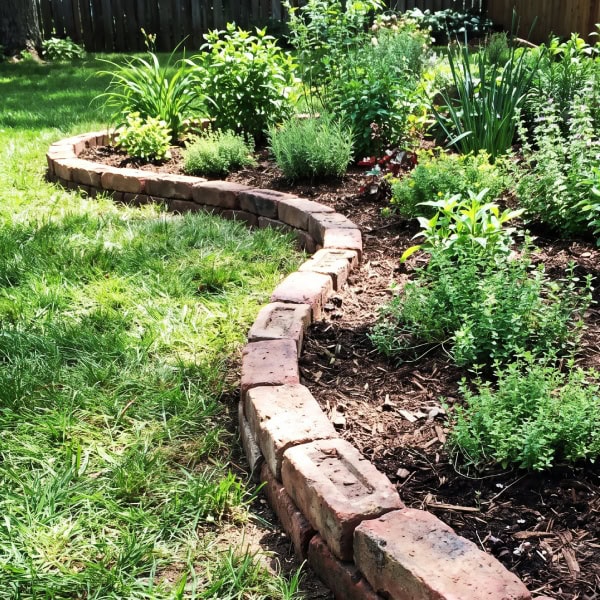
Use sound reclaimed bricks to create a tidy boundary between your lawn and planting beds. Brick serves as durable garden edging that prevents turfgrass from creeping into your soil.
Sort your supply first, setting aside crumbling pieces and checking that enough bricks share a similar thickness. Installing clean landscape edging makes mowing simpler and gives planting borders an intentional look.
For durable garden bed edging, excavate a shallow trench and prepare a firm compacted base with a thin leveling layer. Set each brick securely, checking alignment as you work.
Keep a flat mowing strip level with the grass to let your mower wheel pass over it. In freeze-thaw climates, choose bricks suitable for ground exposure and expect occasional resetting.
6) Build Cedar Raised Beds for Vegetables
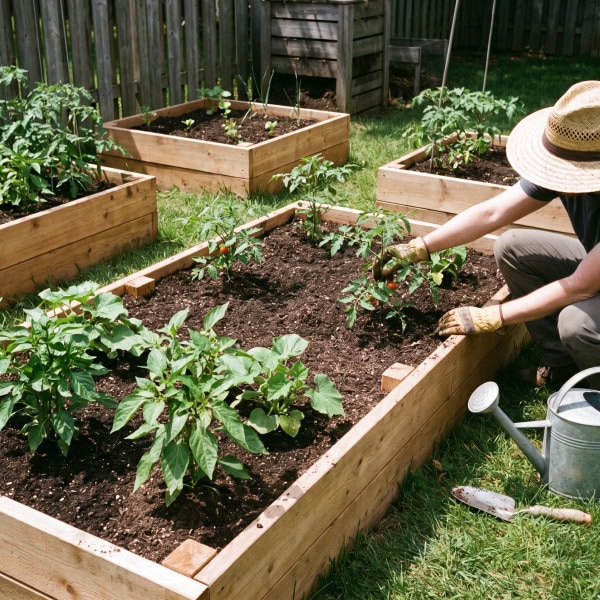
Make your vegetable patch easier to manage with a modest cedar bed that you can reach across without stepping into the soil. Building raised garden beds warms the soil faster in spring and reduces back strain during weeding.
A width of 3–4 feet works when you have access from both sides.
Use exterior-rated screws and brace longer sides against bowing. For an open-bottom bed over clean soil, remove perennial weeds and loosen the ground before filling with a vegetable-bed soil blend.
Keep the bed’s height and footprint manageable because soil adds considerable expense. If you suspect contaminated ground, arrange soil testing and use a growing setup designed to isolate crops from the contamination.
Setting up raised garden beds also allows you to control soil quality and deter burrowing pests. Connecting a simple drip irrigation system keeps your crops consistently watered without daily hand soaking.
7) Arrange a Container Garden Around Your Patio
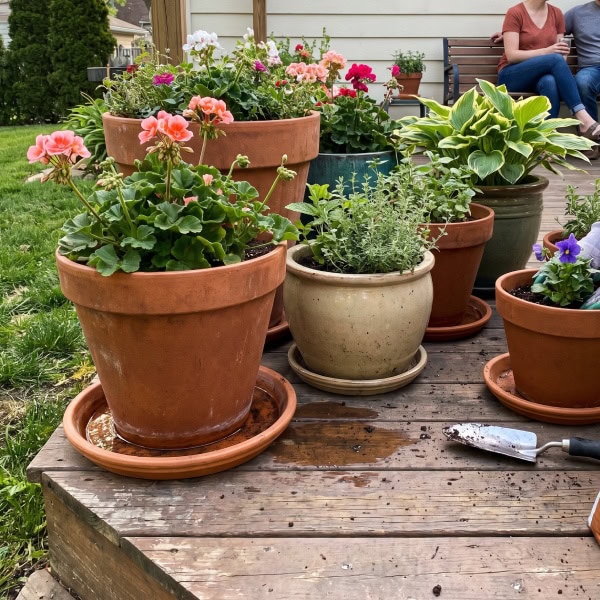
Bring planting closer to your seating area by clustering containers along patio edges and unused corners. Start with a few substantial pots that hold moisture longer than tiny containers.
When grouping potted plants together, combine plants with compatible sunlight and watering needs. Leave enough space around the cluster for walking and sweeping.
Use containers with drainage holes and fill them with potting mix. Keep the drainage openings clear, and empty water-catching saucers after watering.
Displaying vibrant potted plants lets you easily rotate seasonal color onto your patio. Reuse sturdy nursery pots inside decorative covers to refresh your arrangement without replacing every container.
8) Install a Trellis Screen With Climbing Vines
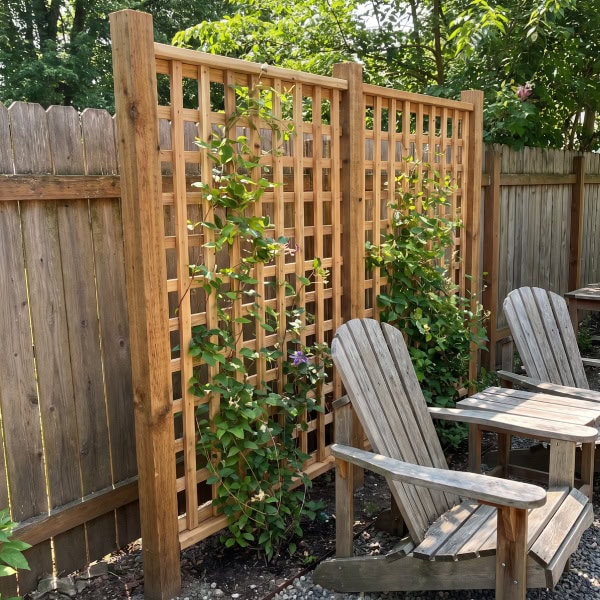
Add seasonal privacy with a sturdy trellis positioned beside your seating area or along an exposed boundary. Place it where foliage will interrupt the sightline you want to screen.
Use rot-resistant framing and exterior-rated fasteners, with posts anchored for your local wind and soil conditions. Confirm fence ownership and local height rules before attaching anything to a boundary structure.
Choose a locally appropriate, noninvasive vine whose mature weight suits the support. Leave access for pruning and repairs, and expect deciduous climbers to provide less screening after their leaves fall.
9) Replace a Lawn Corner With a Pollinator Garden
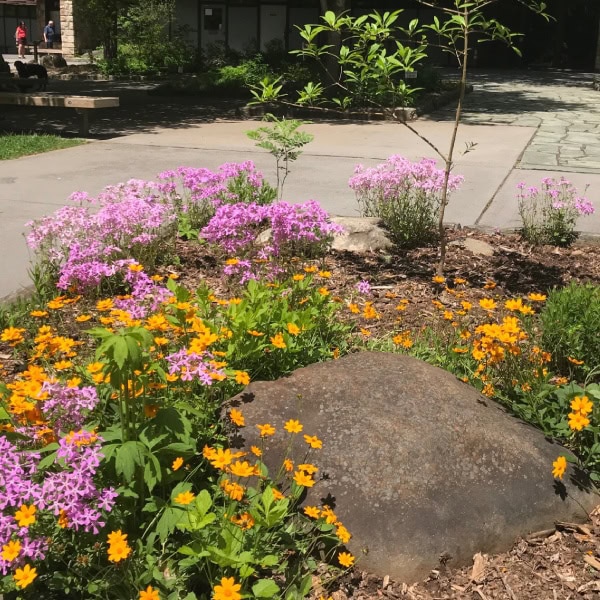
Turn an awkward lawn corner into habitat by planting regionally native flowers with overlapping bloom periods. Choose a spot where you can watch visiting insects without placing busy blooms directly against a narrow walkway.
Remove the grass thoroughly before planting; persistent turf will compete with young flowers. For a manageable budget, establish a small patch with plugs and expand after you learn which plants thrive.
Include locally suitable host plants for butterfly larvae alongside nectar flowers. Keep some stems standing through winter, avoid routine pesticide use, and maintain a crisp outer edge to define the planting.
10) Mount a Vertical Herb Garden on a Fence
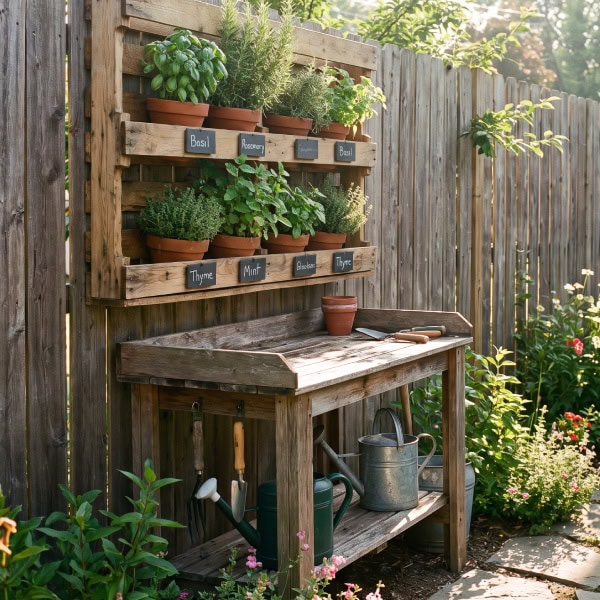
Use a sunny fence to hold individual herb pots within easy harvesting reach. Check that the fence and mounting hardware will support the containers when the potting mix is fully watered.
Plan your herb garden around separate containers so you can give basil more water while keeping thyme in a drier mix. Choose pots deep enough for healthy roots, with clear drainage holes.
Fasten supports into sound structural members and leave an air gap behind the pots. Keep mint in its own container, and position the lowest row where draining water will avoid staining paving.
11) Add Solar Path Lights Along Walkways
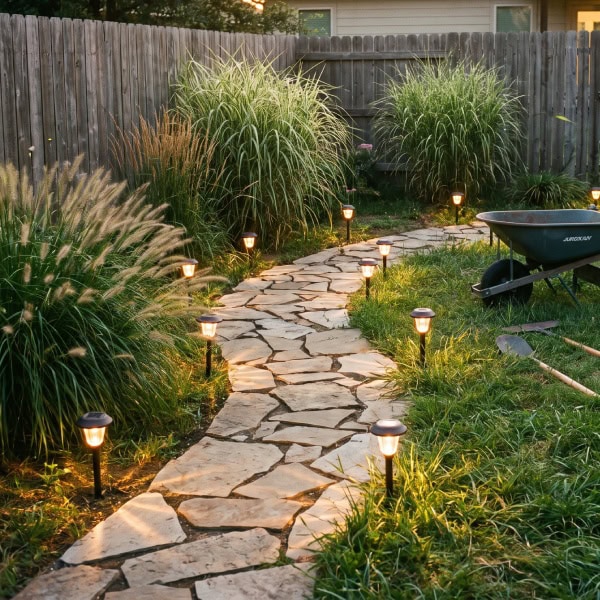
Define your walkway after dark with a small number of solar lights placed at turns and changes in level. Strategic landscape lighting improves nighttime visibility while accentuating your garden paths.
Check each proposed location for adequate direct sunlight before installing the stakes. Space your lights to reveal the walking surface without crowding the path.
Keep fixtures outside mower and trimmer routes, and choose warm-colored models that direct light downward. Clean the solar panels periodically and keep foliage from shading them.
For steps or other areas where dependable illumination is essential, use hardwired landscape lighting with a reliable power supply.
Thoughtfully planned landscape lighting highlights garden focal points while maintaining safe footing on dark evenings.
12) Plant a Layered Shade Garden Under Trees
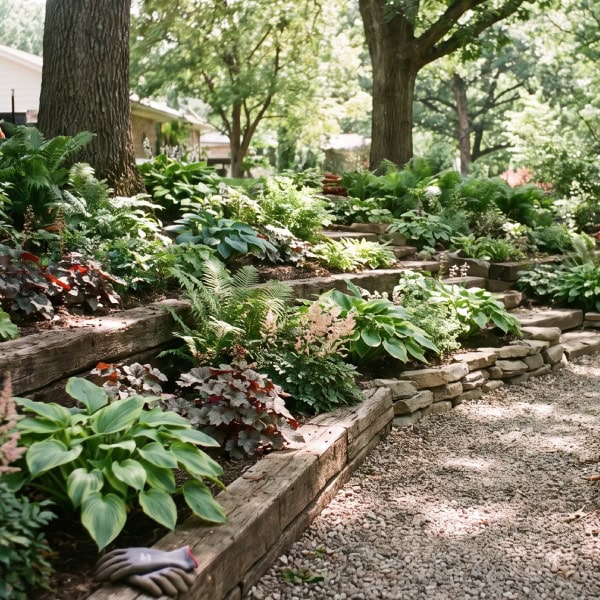
Create interest beneath your trees with shade-tolerant plants arranged around existing roots. Assess whether you have dry shade or consistently moist soil before choosing your planting mix.
Use small starts of locally suitable low-maintenance perennials for shade so you can tuck them into gaps with minimal digging. Combine contrasting leaf sizes and repeat a few plants to keep the area cohesive.
Preserve the tree’s existing soil level and exposed root flare. Avoid cutting substantial roots or piling soil over them, and apply a light mulch layer clear of the trunk.
13) Turn a Downspout Area Into a Rain Garden
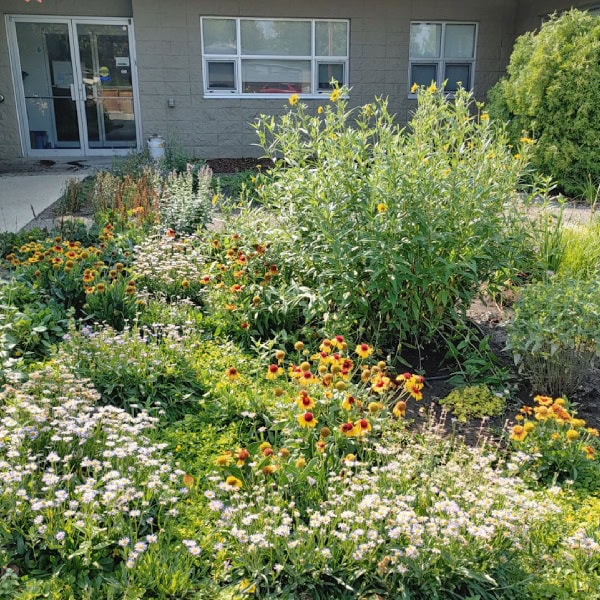
Capture roof runoff in a shallow planted basin where your soil allows water to soak away promptly. Locate it at least 10 feet from your foundation, with additional separation where local guidance requires it.
You can also connect a rain barrel to the downspout to store water for nearby planting before overflow enters the basin.
Check infiltration and underground utilities before digging. Keep the basin away from septic systems, and provide a safe overflow route that avoids neighboring property.
Choose plants suited to brief flooding followed by drier periods, with moisture-loving species in the lowest area. Design for the captured water to drain within 24–48 hours; seek drainage advice if your test hole stays wet.
14) Build a Dry Creek Bed With River Rock
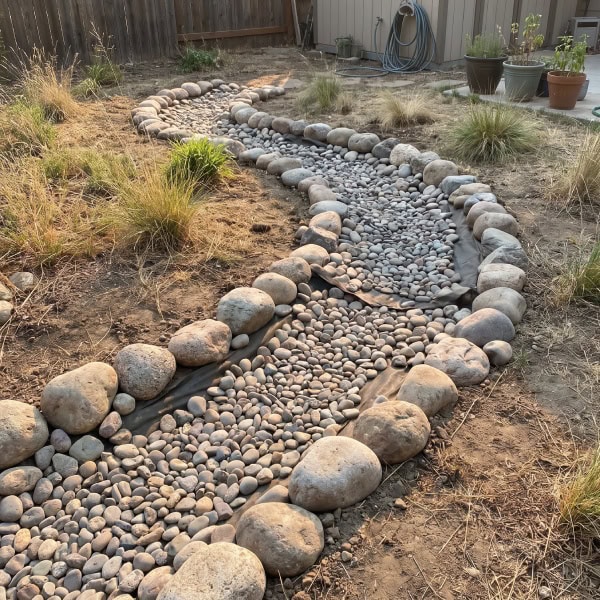
Give an existing shallow drainage route a defined appearance with a stone-lined dry creek bed. Trace the water’s path during rainfall before deciding where your channel should run.
Use your landscaping stones in varied sizes, placing larger pieces partly into the ground along the edges. Build a broad, gently shaped channel with an appropriate erosion-control underlayer where flowing water requires it.
Keep the outlet lawful and clear of your foundation and neighboring yards. Treat serious erosion or recurring flooding as a drainage problem requiring proper sizing, since decorative rocks alone will not resolve it.
15) Create a Drought-Tolerant Gravel Garden
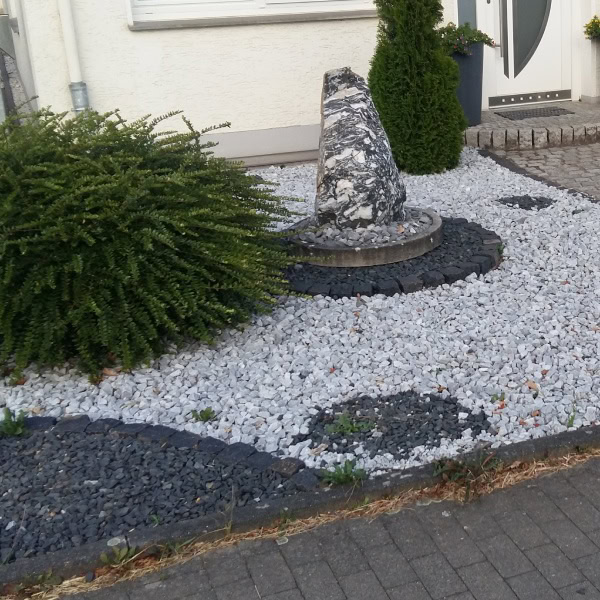
Reduce irrigation demand by pairing climate-suited plants with a gravel surface and freely draining soil. Begin with a sunny area where water drains readily after rain.
Remove established weeds and select noninvasive plants adapted to your regional conditions. Use mature plant dimensions to space them, leaving room for access while the planting fills in.
Choose gravel that suits your plants and site; stone reflects and stores heat. Keep it clear of plant crowns and maintain soil access for weeding. Water deeply during establishment, then adjust irrigation to the needs of your established plants.
16) Build a Wooden Arbor Over a Garden Entrance
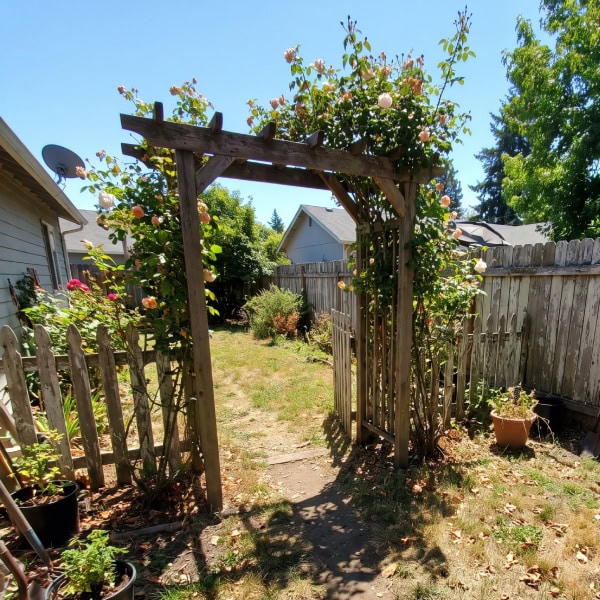
Frame your garden entrance with a simple arbor sized for comfortable passage and future plant growth. Allow enough clear width for your wheelbarrow or mower if either uses that route.
Use a proven outdoor building plan and lumber rated for its exposure. Anchor posts according to local soil, frost depth, and wind conditions, and use compatible corrosion-resistant hardware.
Assemble and finish manageable components at ground level before lifting them into place with help. If you intend to grow a vine overhead, include its mature weight in your structural planning.
17) Train Flowering Climbers Over a Bare Fence
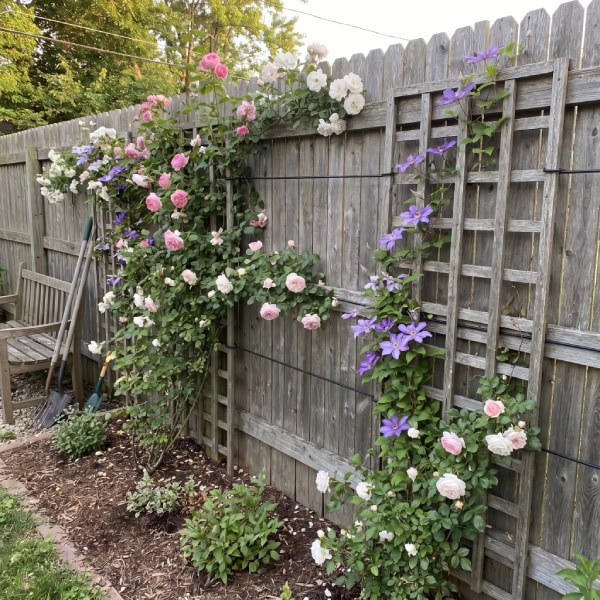
Soften a plain fence with flowering climbers trained along wires or trellis panels. Match your plant choice to the fence’s strength and the amount of sunlight the planting receives.
Install supports with enough clearance for airflow and maintenance. Plant outside the driest strip immediately beside the fence, then guide new stems with loose, flexible ties.
Select a noninvasive climber suited to your region, such as an appropriate clematis or climbing rose. Check its mature size and pruning requirements before planting, and keep growth clear of gates and neighboring property.
18) Replace Sparse Grass With Steppable Ground Covers
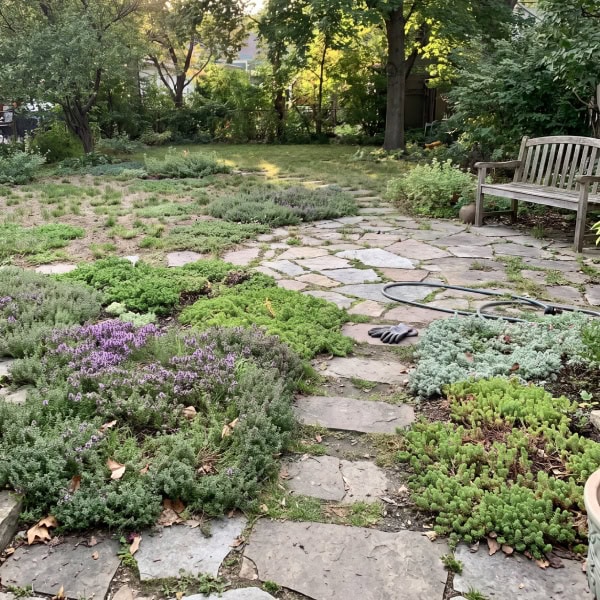
Fill lightly traveled gaps with low-growing plants matched to your sunlight and drainage. First identify why the grass is thinning, since compaction or standing water will also challenge replacement plants.
Choose perennial ground covers for sunny areas only where the site provides their required light. Creeping thyme suits some sunny, well-drained locations, while locally appropriate alternatives serve other conditions.
Remove turf and weeds before setting plugs at their recommended spacing. Keep foot traffic off the planting until roots establish, and use stepping stones along heavily traveled routes.
19) Make a Small Fountain With Terracotta Pots
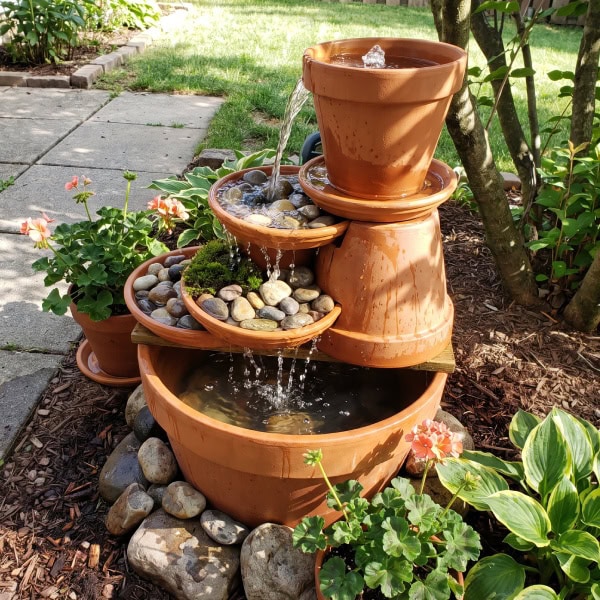
Add moving water beside your patio with a terracotta-pot fountain built around a watertight reservoir. Use sound pots, a submersible fountain pump, and tubing matched to the pump outlet.
Support each tier securely so you can reach the pump for cleaning. Terracotta is porous, so use a suitable liner or water-safe sealing system where the design needs to retain water.
Follow the pump’s instructions and use a GFCI-protected outlet with outdoor-rated connections. Maintain enough water to keep the pump submerged, clean the reservoir regularly, and drain vulnerable components before freezing weather.
20) Build a Garden Bench From Outdoor-Rated Lumber
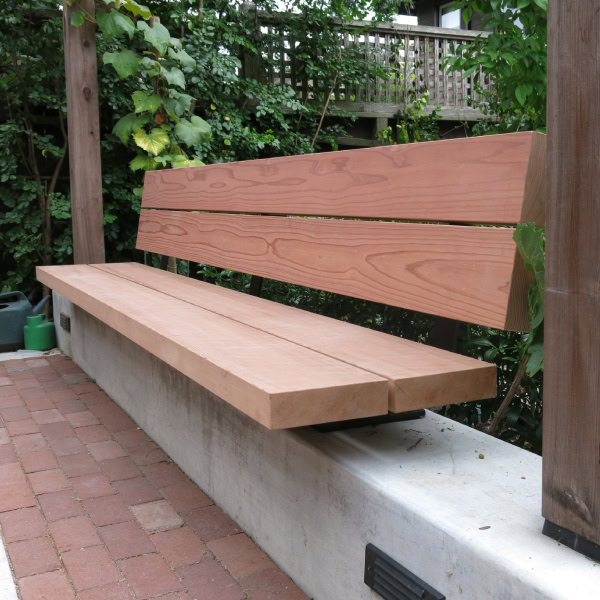
Give yourself a permanent resting spot with a bench built from a tested outdoor furniture plan. Choose lumber suitable for weather exposure and ground contact wherever the design requires it.
Use the plan’s specified board sizes and corrosion-resistant fasteners. Include leg bracing, smooth exposed edges, and space between seat boards for drainage.
Position your bench on firm, level supports so its feet stay out of wet soil. Check for wobble and sound connections before use, then apply an exterior finish compatible with the lumber and maintain it according to the label.
21) Hang String Lights Above a Seating Area
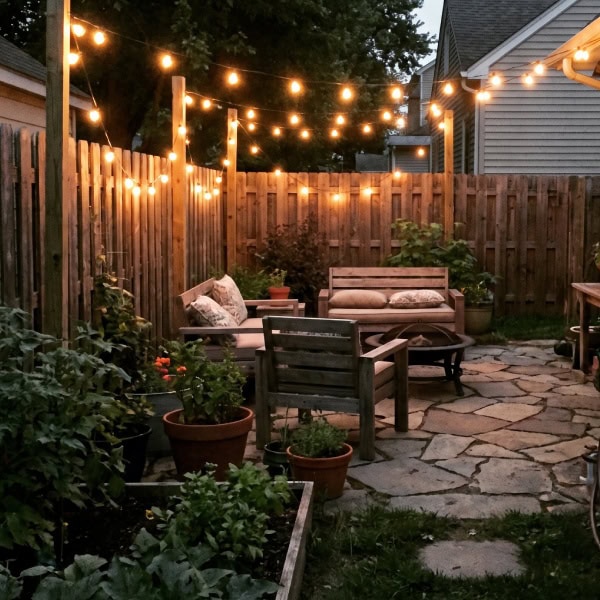
Define your evening seating area with outdoor-rated string lights supported above head height. Plan the route around doors and walking areas, following the manufacturer’s clearance requirements.
Use secure structural attachment points, such as the rafters of a pergola, and a support cable if the light manufacturer specifies one. For freestanding posts, follow a design that accounts for wind and cable tension; light planter pots provide unreliable anchoring.
Connect to GFCI-protected power and use weather-rated connections suited to the installation. Keep cords out of standing water and avoid fastening through electrical cable. Follow the stated limit for connected strands.
22) Build a Potting Bench From Reclaimed Wood
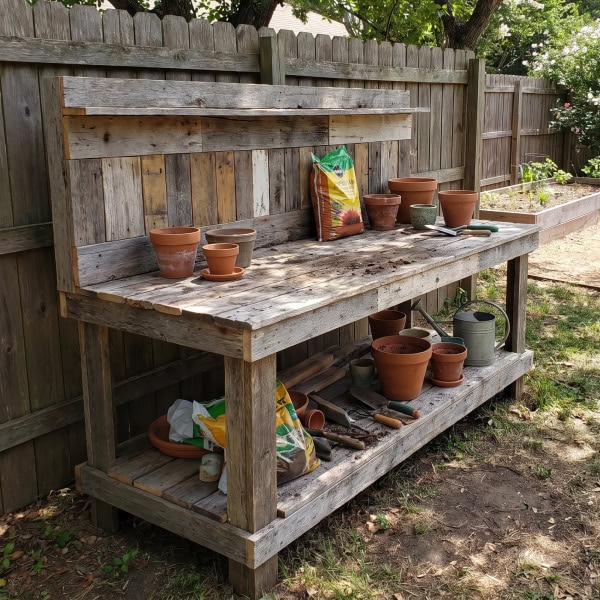
Make repotting easier with a sturdy work surface built from clean reclaimed lumber of known origin. Inspect each board for rot and remove hidden screws or nails before cutting.
Choose a working height that lets you fill pots without hunching. Brace the frame against side-to-side movement and add a lower shelf sized for your heaviest supplies.
Keep unknown treated or painted salvage away from edible-growing materials. Leave small gaps in the worktop for drainage, secure tools on blunt hooks, and store potting mix in a covered container beneath the bench.
23) Create a Cottage Garden Around a Birdbath
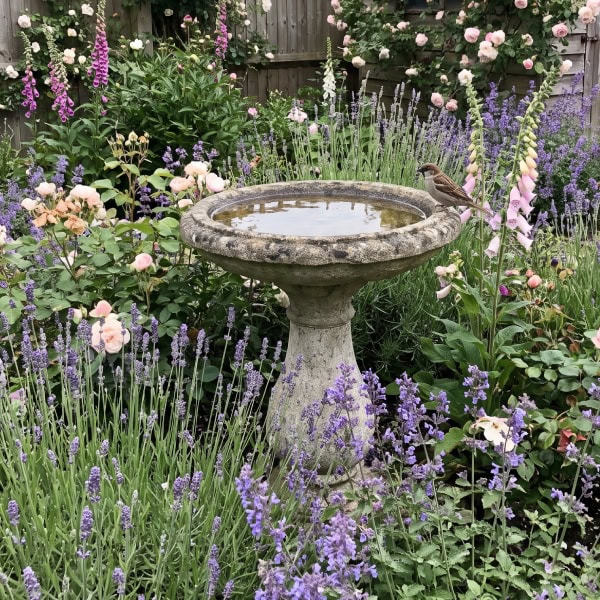
Anchor an informal flower bed with a stable birdbath and repeated groups of flowering plants. A clean bird bath provides fresh drinking water for local wildlife and acts as an attractive visual centerpiece.
Place the basin where you can reach it easily for frequent cleaning and refilling.
When you create a cottage garden, leave room for mature growth even if your young plants look widely spaced. Use annuals temporarily between slower-growing perennials, keeping an access gap around the basin.
Choose a shallow birdbath with a textured surface and keep surrounding cover far enough away to reduce ambush opportunities for cats. Refresh water frequently, scrub the basin regularly, and avoid adding chemicals.
24) Plant a Spring Bulb Drift Along a Walkway
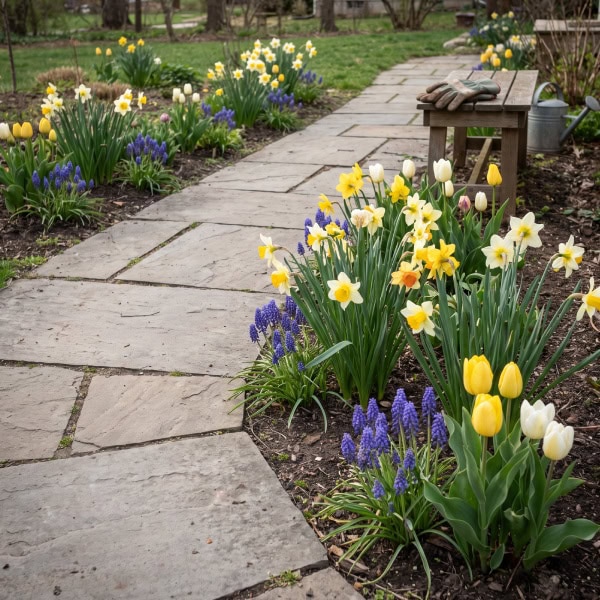
Bring early color to your walkway with bulbs planted in loose, repeated groups. Choose varieties suited to your winter climate and check local invasive-plant guidance before selecting spreading species.
Plant at the depth and season specified for each bulb, leaving enough setback for foliage to stay off the path. In cold-winter regions, plant spring-flowering bulbs in fall while the ground remains workable.
Position bulbs among later-emerging perennials so you can leave their foliage until it yellows naturally. If children or pets use the area, account for bulb toxicity when choosing plants and storing unplanted bulbs.
25) Build a Low Dry-Stack Stone Garden Border
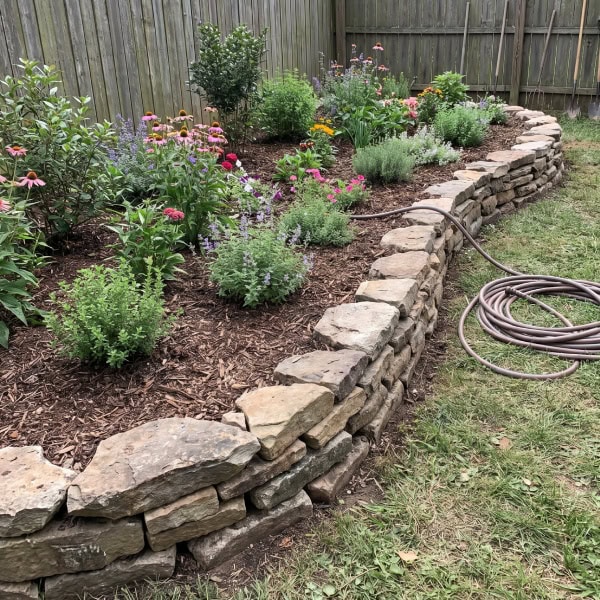
Define a planting bed with a low, freestanding stone border built on firm ground. Installing natural stone edging adds rustic texture while creating a dependable barrier against encroaching grass.
Keep your first project to a few courses, where you can handle and seat each stone safely.
Prepare a shallow trench with a compacted crushed-stone base. Put the broadest stones on the bottom, stagger vertical joints, and select pieces that fit together securely.
Keep each course level and check every stone for rocking. If your project must hold back a slope or support a substantial change in soil level, use a properly designed retaining-wall system with suitable drainage.
26) Make a Compact Wildlife Pond From a Watertight Tub
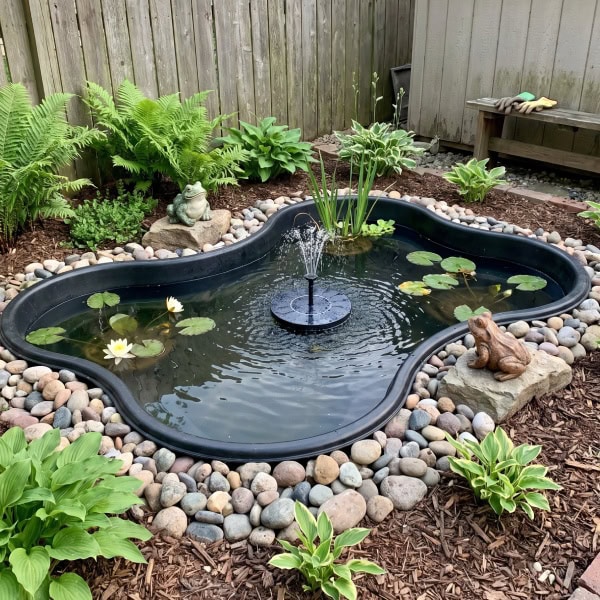
Create a small aquatic habitat with a sound, watertight tub positioned on a stable, level base. Choose a container suitable for aquatic life and place it where you can maintain it easily.
As you build a small container pond, provide a firmly secured, rough-textured escape ramp reaching from the water to the rim. Add regionally appropriate aquatic plants and leave room for growth.
Use rainwater from a suitable collection system or treat tap water for chlorine and chloramine. Check local mosquito guidance, avoid adding fish to a wildlife tub, and restrict children’s access with appropriate safeguards.
27) Install a Drip Irrigation System in Garden Beds

Deliver water near plant roots with drip irrigation tubing arranged around your established planting layout. Sketch your bed first and group plants with similar moisture requirements on the same watering zone.
Fit the drip irrigation system with backflow protection required locally, a filter, and the pressure regulator specified for the tubing. Flush the lines before closing their ends, then pin the tubing securely.
Run a test cycle and check moisture several inches into the soil. Adjust runtime to your soil and weather, reposition emitters as plants grow, and follow the manufacturer’s winterizing instructions where freezing occurs.
28) Build a Slatted Screen to Hide Trash Bins

Conceal your trash bins with an open-sided slatted screen that preserves convenient access. Measure your bins with their lids fully raised and allow enough room to roll them out without scraping the frame.
Anchor posts for your soil and wind conditions, then attach exterior-rated slats with consistent gaps. Keep wood clear of damp ground and use hardware compatible with the lumber.
Set the bins on a firm, draining surface and preserve a clear route to collection. Check local rules before building near the street, and keep the enclosure clear of utility meters and service access.
29) Create a Children’s Sensory Garden With Fragrant Plants

Give children a place to explore with clearly identified, non-toxic plants chosen for fragrance and texture. Use a compact layout that you can supervise easily from a nearby seat.
Consider culinary herbs such as basil and rosemary where your climate supports them, along with soft-textured plants verified as suitable for your household. Place flowering plants that attract many bees away from the narrowest passage.
Keep thorny plants and irritating sap out of reach. Teach children to ask before tasting anything, check for allergies, and keep fertilizers and tools in secure storage outside the sensory area.
30) Make Leaf-Imprinted Concrete Garden Accents

Add botanical detail to your beds with small concrete ornaments cast against textured leaves. Use leaves from plants safe to handle and work on a protected surface away from food preparation.
Follow the concrete mix label for water quantity and curing conditions. Wear waterproof gloves and eye protection, with suitable respiratory protection when handling dry mix; wet cement causes chemical burns.
Press the leaf’s veined side into the prepared surface, then remove it at the appropriate stage for your mix. Cure the piece fully before placing it among plants, and keep thin decorative casts outside walking routes.