
To overwinter canna lilies in pots, leave the rhizomes in their existing containers, cut back dying foliage, and move the pots into a cool, reliably frost-free space for dormant storage. Keep the potting mix mostly dry through winter, then restart growth in spring as your local frost risk eases.
Knowing how to overwinter canna lilies in pots saves you digging and repotting by storing the whole container. If space is tight, lift and pack the rhizomes; if you have strong indoor light, keep your cannas growing as houseplants. Your watering and lighting routine needs to match the method you choose.
Whether you grow ‘Cleopatra’ canna lilies or another garden variety, protect the fleshy underground growth from freezing and prolonged wetness.
Keep Dormant Plants in Their Pots
Mastering how to overwinter canna lilies in pots is straightforward when your potted canna lilies stay in their containers. Give the resting canna rhizomes cool conditions and very little moisture; once you remove the foliage, you need no winter lighting.
When Should You Bring Pots Inside?
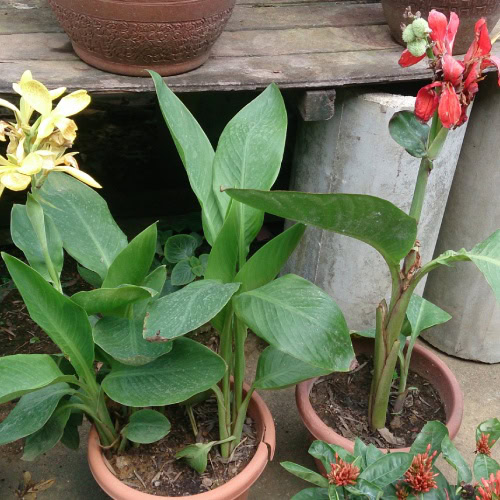
Use declining growth and your frost forecast to time the move. As flowering finishes and leaves yellow, reduce watering and prepare your storage space.
You can let a light frost blacken the foliage, provided you move the pot under cover before freezing temperatures penetrate the root ball. If a hard freeze is forecast, bring the container inside earlier. You do not need to expose your cannas to frost to store them.
Keep their winter arrangements separate from any winter plants for pots you leave outdoors. Fleece adds temporary protection, but you cannot rely on a wrapped pot to stay frost-free through prolonged cold.
How Far Should You Cut Back the Foliage?
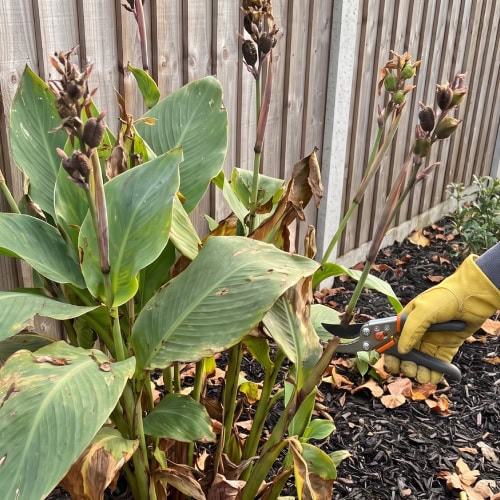
Cut down the stems once you are ready to put your cannas into dormant storage. You can leave 4 to 6 inches of stem above the soil, giving yourself short stubs that are easy to inspect.
Use clean, sharp pruners and remove fallen leaves from the pot surface. Keep your cuts above the soil so you avoid slicing into the rhizomes. If you intend to keep the plant actively growing indoors, retain its healthy green foliage.
Where Should You Store Dormant Pots?
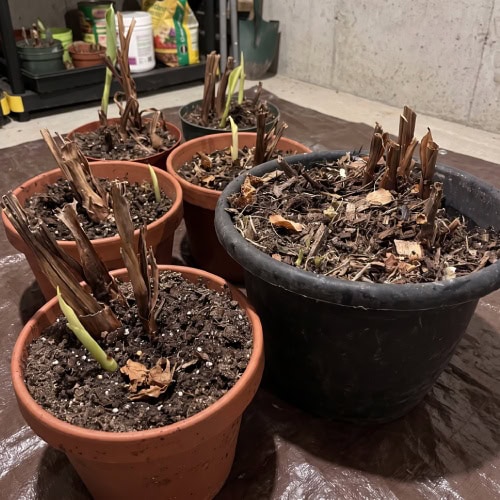
Choose a basement, cellar, or another sheltered space where you can maintain frost-free conditions. Aim for 40 to 50°F during dormant storage.
Check the temperature with a thermometer, especially during cold snaps. An attached garage still needs monitoring because its temperature changes with the weather.
You can store leafless pots in darkness. Keep them away from heating vents and leave enough space around each container to inspect the soil and stem bases.
How Much Water Do Dormant Cannas Need?
Keep the mix mostly dry, checking its condition before you add any water. You need enough residual moisture to prevent severe shriveling, while keeping the resting rhizomes out of persistently wet soil.
Feel below the surface with your finger or a wooden skewer. If the root ball retains moisture, leave it alone. If it becomes dry throughout and an exposed rhizome starts to wrinkle, add a small amount of water around the pot’s edge.
Skip fertilizer during dormancy. Empty saucers and keep drainage holes clear so any excess water escapes.
Lift and Store Rhizomes to Save Space
Lift your canna lily rhizomes when storing large pots would take too much room. You can pack several clumps into a ventilated box, provided you dry their surfaces and keep them protected from freezing.
How Do You Remove, Inspect, and Dry Rhizomes?
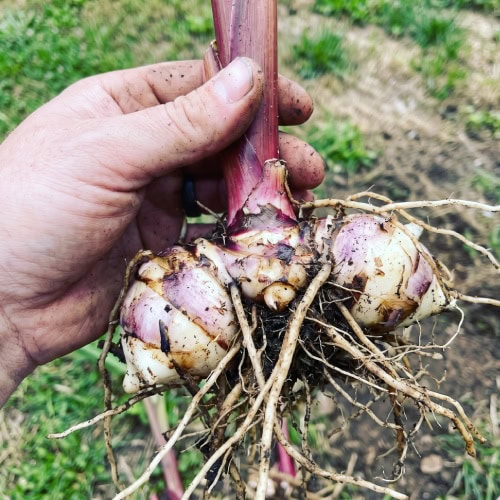
Although you will see them sold as “canna bulbs,” you are handling rhizomes: thick underground stems with growing points. Treat them gently because bruised or cut tissue gives decay an entry point.
- Cut back the foliage and label the variety.
- Ease the root ball out of its pot, supporting it from underneath.
- Gently loosen excess soil with your fingers, leaving stubborn soil attached.
- Inspect the clump and discard soft, foul-smelling, or extensively rotten material.
Leave healthy clumps somewhere sheltered and airy to surface-dry. Allow one to two days of drying before storage, adjusting for how wet the attached soil feels. Keep sound clumps together until spring to limit fresh wounds before storage.
Which Storage Materials Prevent Rot and Shriveling?

- Improves Root Development: Promotes faster root growth and strong anchorage in seedlings when mixed with soil, peat, composted bark, or...
- Moisture Retaining Power: Absorbs over 3x its volume in water, making it ideal for passive hydroponics, seed germination, cutting...
- Nutrient Boosting Mineral: Naturally attracts and holds ammonium, potassium, calcium, and magnesium for steady, balanced nutrient delivery...
Pack your dried clumps loosely so air reaches them and you can remove each one for inspection. Use a cardboard box, ventilated crate, or paper bag.
For cushioning, choose vermiculite, loosely shredded newspaper, or peat moss. Well-aerated peat moss cushions the clumps effectively, while vermiculite gives you an easy peat-free alternative to move aside during checks.
Begin with dry to barely damp packing material, depending on how dry your storage room is. If you store clumps in peat moss, ensure it never feels wet. Avoid sealing clumps in airtight plastic, and label each container clearly so you can identify varieties without unpacking them.
What Should You Check During Winter?
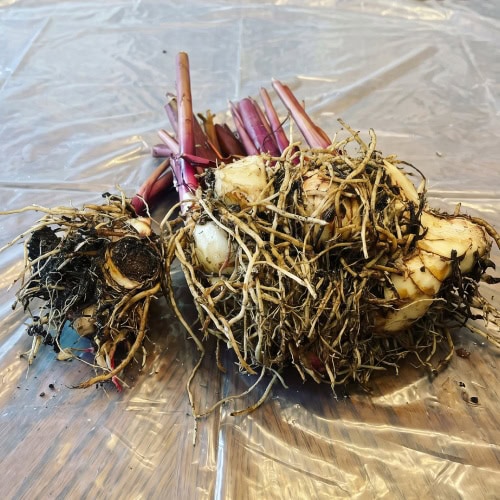
Inspect your stored rhizomes about monthly, and sooner if you notice condensation or an unpleasant smell. Feel for firmness and look around the old stem bases, where damp debris sometimes collects.
Respond to what you find:
- Soft, wet tissue or a sour smell: Remove affected rhizomes and replace damp packing material.
- Heavy wrinkling with firm tissue: Lightly moisten the surrounding material, keeping water off the rhizomes.
- Mold on packing material: Improve ventilation and check the clumps beneath it.
- New shoots: Check whether your storage space has become too warm.
If shoots continue developing, move those rhizomes into pots and give them light. Avoid leaving pale growth stretching inside a closed box.
Can You Keep Cannas Growing Indoors All Winter?
You can keep canna lilies growing indoors if you provide strong light and a warm growing space. Your potted canna lilies will need more attention than dormant plants, particularly as winter daylight decreases.
How Much Light and Warmth Do Growing Cannas Need?
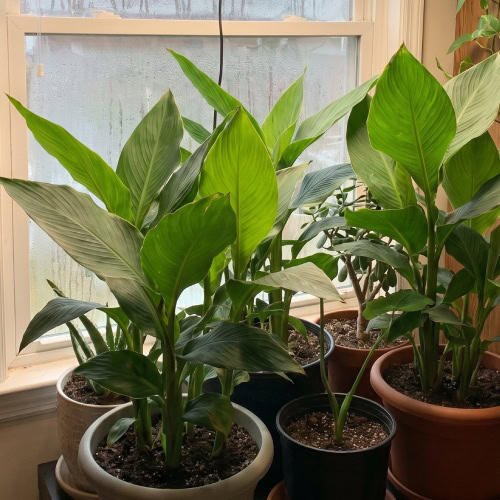
Bring your cannas inside before frost damages the leaves if you want to preserve their growth. Place them at your brightest suitable window, with enough room for the foliage to spread without pressing against cold glass.
Supplement weak winter daylight with a full-spectrum grow light. You can provide around 12 to 14 hours of total light daily, adjusting the lamp’s position to its manufacturer’s instructions.
Choose a comfortably warm room with stable temperatures. If you see long, weak stems leaning toward the window, increase the light. Expect foliage to be easier to maintain than winter flowers.
How Should Watering and Feeding Change Indoors?
Water your growing cannas thoroughly when the upper layer of potting mix begins to dry, then let excess water drain away. Check the soil each time because indoor water use changes with light, room warmth, and leaf growth.
Keep the root ball lightly moist while your plant is actively producing leaves. Empty the saucer after watering, and reduce watering if growth slows.
Feed only while you have steady new growth under adequate light, following the fertilizer label. Pause feeding if your plant stalls; extra fertilizer will not correct insufficient light.
How Can You Manage Indoor Pests?
Inspect your cannas before bringing them indoors, paying close attention to leaf undersides and tightly rolled new growth. Keep newly moved plants separate from your other houseplants until you have checked them repeatedly.
Look for fine webbing, sticky leaves, cottony patches, or insects that fly up when you disturb the foliage. Rinse pests from the leaves where practical and remove badly affected foliage with clean tools.
For a persistent infestation, use a treatment labeled for the pest and for indoor ornamental plants. Follow its application and repeat-treatment directions, and test a small leaf area before treating the whole plant.
Restart Growth and Move Plants Outside in Spring
Restart your stored canna rhizomes indoors before your growing season begins, then move the plants outside after frost danger passes. Give newly sprouting canna lily rhizomes warmth and light while you increase watering gradually.
When Should You Resume Watering and Repot?
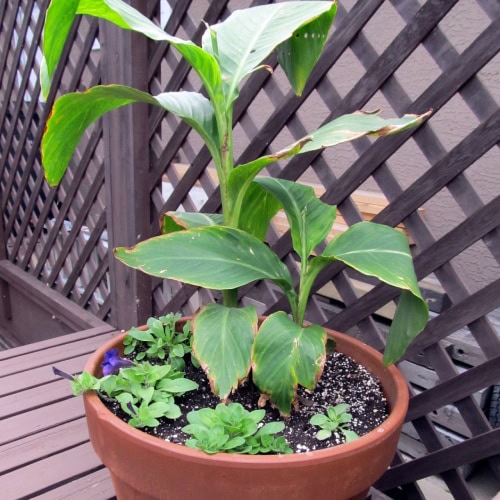
Work backward from your local last expected frost when planning an indoor start. You can pot up stored rhizomes about four to six weeks beforehand, allowing extra flexibility if spring stays cold.
Check each clump for firmness before planting. Set healthy rhizomes horizontally in fresh, free-draining potting mix, with their growing points facing upward and about 3 to 4 inches of mix above them.
For whole-pot storage, repot if the container is crowded or the mix has deteriorated. Water lightly at first, then increase moisture as shoots and leaves develop. As with other perennial flowers for pots, choose a container with clear drainage holes and room for seasonal growth.
How Do You Divide Crowded Rhizomes?

Divide crowded clumps in spring when you can identify the growing points. Ease the clump apart by hand where possible, using a clean, sharp knife for firm connections.
Keep at least one healthy eye, or growing bud, on every division, along with a substantial piece of firm rhizome. Discard hollow or decayed sections and clean your knife between suspect cuts.
Let cut surfaces dry for a few days before planting. Pot the divisions separately so you have room to water and inspect each developing plant.
When Is It Safe to Harden Off Cannas?
Begin moving your cannas outdoors once frost danger has passed and the soil has warmed. Use your local forecast alongside the average last frost date, especially if you have already encouraged tender indoor growth.
Start with short periods in a sheltered spot with gentle light. Gradually extend outdoor time and introduce stronger sun, bringing the pots back under cover whenever frost threatens.
Protect broad new leaves from strong wind during the transition. Once your plants have adjusted, place them in their sunny summer position and increase watering as warm weather and expanding foliage dry the pots faster.